

Short Answer
A personal access token is the new credential for APIYI’s management APIs. It lets your scripts and automation tools call the balance query, log query and token management APIs. It replaces the old system token. You can grant only the permissions you need, set an expiry date and restrict it to an IP allowlist. Each account can hold up to 20 tokens, so you can issue one per purpose.Personal access tokens cannot call models. To call models, keep using your API Key (called a “model key” in the console, starting with
sk-).How It Differs from the System Token
How to Create One
1
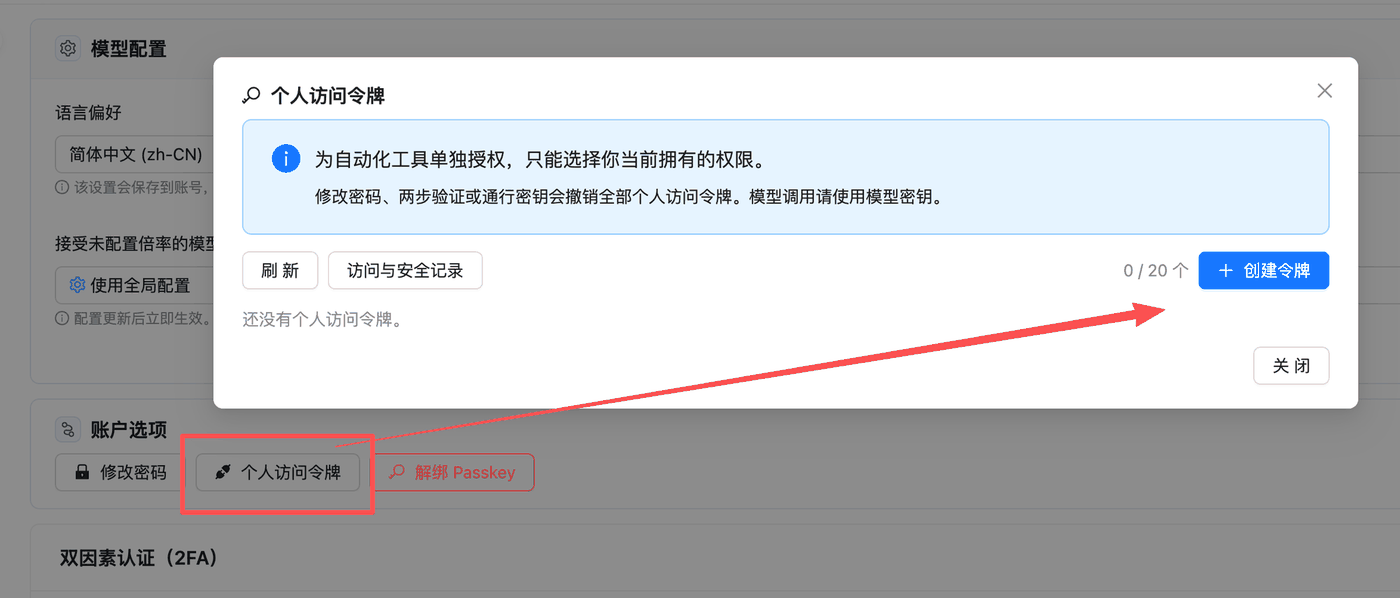
Open Personal Access Tokens
Sign in to the console and go to your profile page at
api.apiyi.com/account/profile. Under Account Options, click Personal Access Tokens, then click Create Token in the top-right corner.2
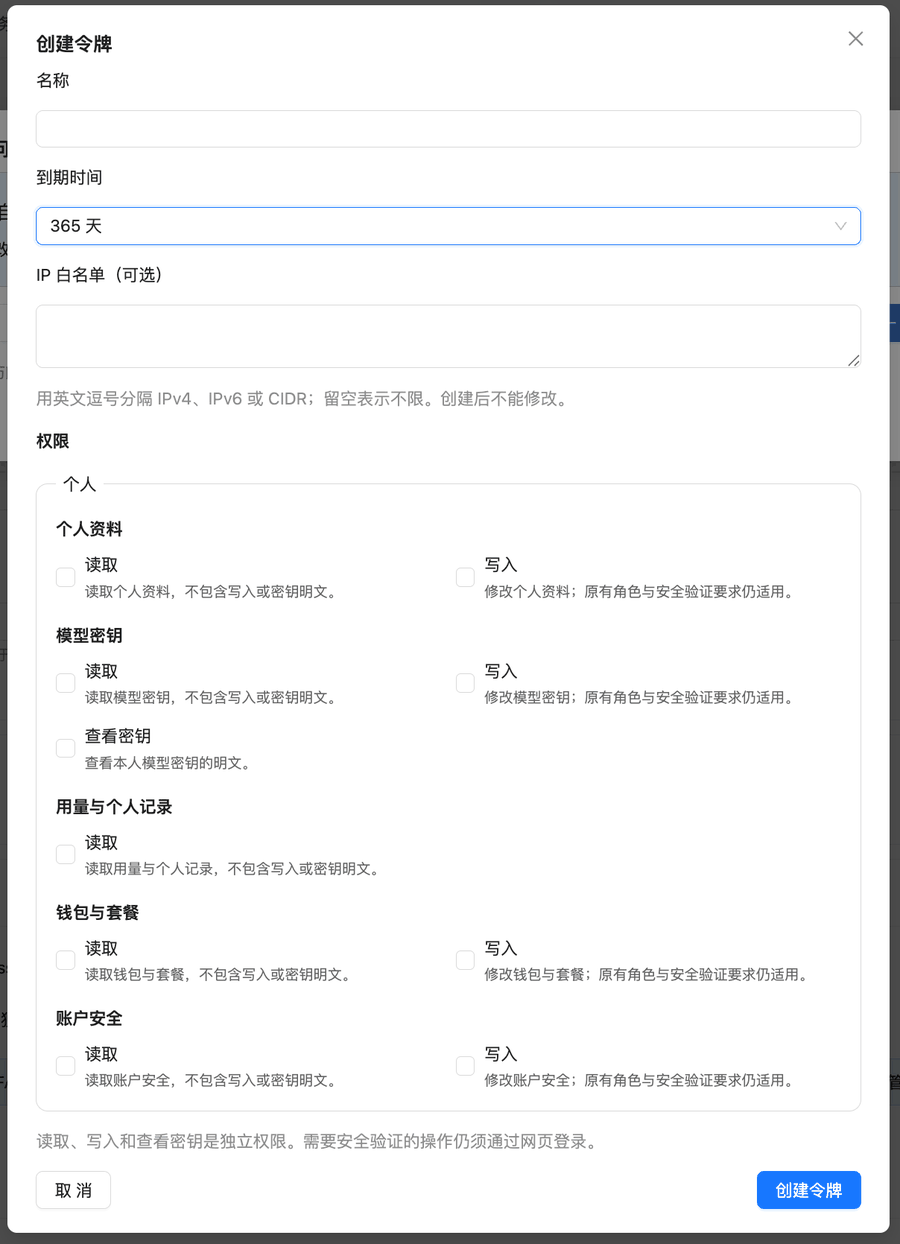
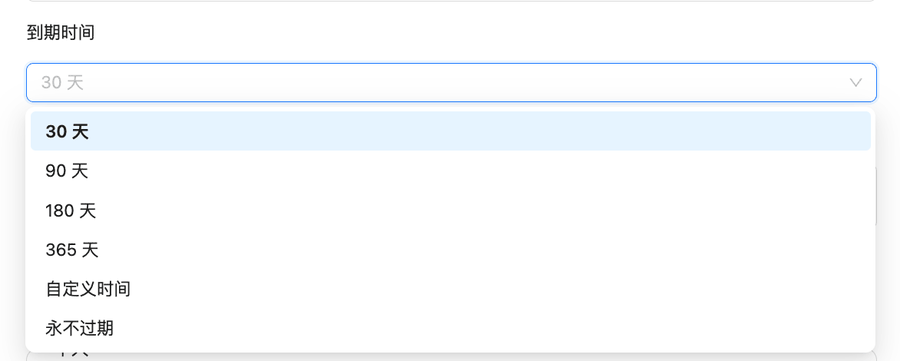
Name it and choose an expiry
Give it a name that says what it is for, such as “reconciliation script” or “balance monitor”. The default expiry is 30 days, and the token stops working when it expires. We recommend a longer period (for example 365 days) so your scripts don’t break unexpectedly.
3
Set an IP allowlist (optional)
Separate multiple entries with commas. IPv4, IPv6 and CIDR are supported. Leave it empty for no restriction. The allowlist cannot be edited after creation. See the recommended workflow below.
4
Select permissions
Select only what your script uses. See the table below.
5
Create and save the token
Click Create Token, then copy the token right away and store it securely.
Which Permissions to Select
There are three kinds of permission: read, write and reveal secret. Each is granted separately. Write does not include read, and read does not show a key’s plaintext.
For example, a daily reconciliation job only needs “Usage & personal records · Read”, and a balance monitor only needs “Profile · Read”.
Actions that require security verification, such as changing your password or two-factor settings, still have to be done after signing in to the website. A personal access token cannot perform them, even with write permission.
Setting Up the IP Allowlist Safely
The allowlist cannot be edited after creation. To change it, you must create a new token. We recommend this order:- Create a token without an allowlist and get your script working.
- Once it works, create the production token with an allowlist. Include every egress IP you might use: production servers, standby servers, and an office network you may need for troubleshooting.
- Switch to the production token and delete the test token that has no allowlist.
How to Use It
Usage is the same as with the system token. Put the token itself in theAuthorization header. The Bearer prefix is optional.
Common Errors
Related Docs
Balance Query API
Check your account balance with a personal access token
Log Query API
Pull call records by time range for reconciliation
Token Management API
Create, rotate and delete API Keys programmatically
How to Manage API Keys Securely?
Permission boundaries and leak prevention for API Keys